


Configuring Built-In Variables in Google Tag Manager
This blog post explores Google Tag Manager’s (GTM) built-in variables, pre-defined functions that automatically capture data relating to website interactions like clicks and page URLs. Learn how to enable (configure) and utilise these variables to streamline tag configuration and improve data collection, allowing you to gain deeper insights into user behaviour.


What are Built-In Variables?
Built-in variables are pre-defined functions within GTM that automatically capture common information around website interactions. These variables act as placeholders for dynamic values, such as clicked elements, page URLs, and user engagement metrics. However, it’s crucial to note that built-in variables are not enabled by default.
Why Enable Built-in Variables?
- Streamlined Tag Configuration: Built-in variables eliminate the need to manually define common data points for each tag, saving time and reducing errors.
- Improved Tag Management: Built-in variables provide a standardised approach to data collection, facilitating consistency and maintainability across your GTM implementation.
- Built-in variables are fundamental for adding parameters to your tags: For instance, when configuring a Google Analytics event tag to track button clicks, you can utilise the “Click Text” variable to dynamically capture the text of the clicked button and pass it as an event parameter. This provides valuable context to your analytics data.
Configuring Built-in Variables:
- Access your desired GTM container and navigate to the “Variables” section.
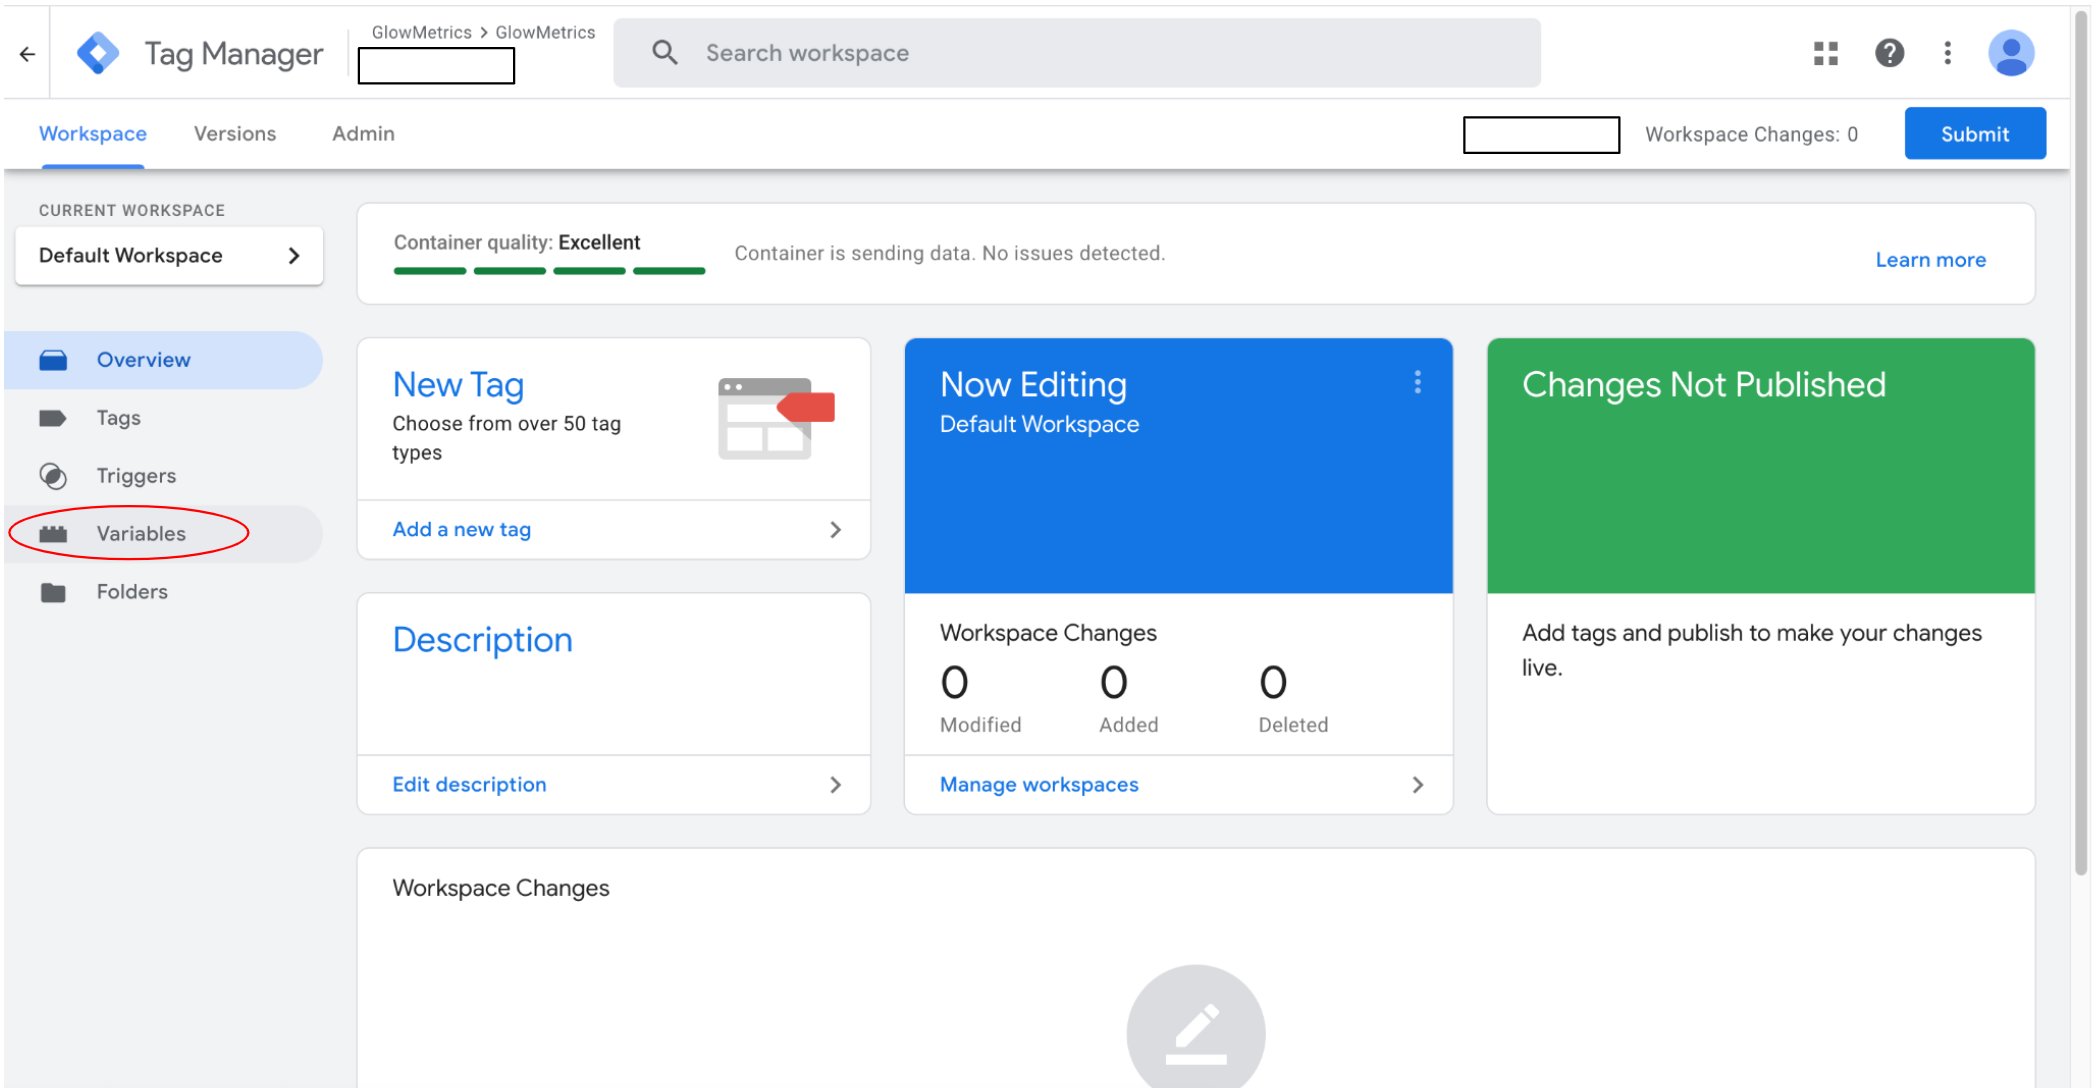
- Locate “Built-in Variables” and select “Configure.”
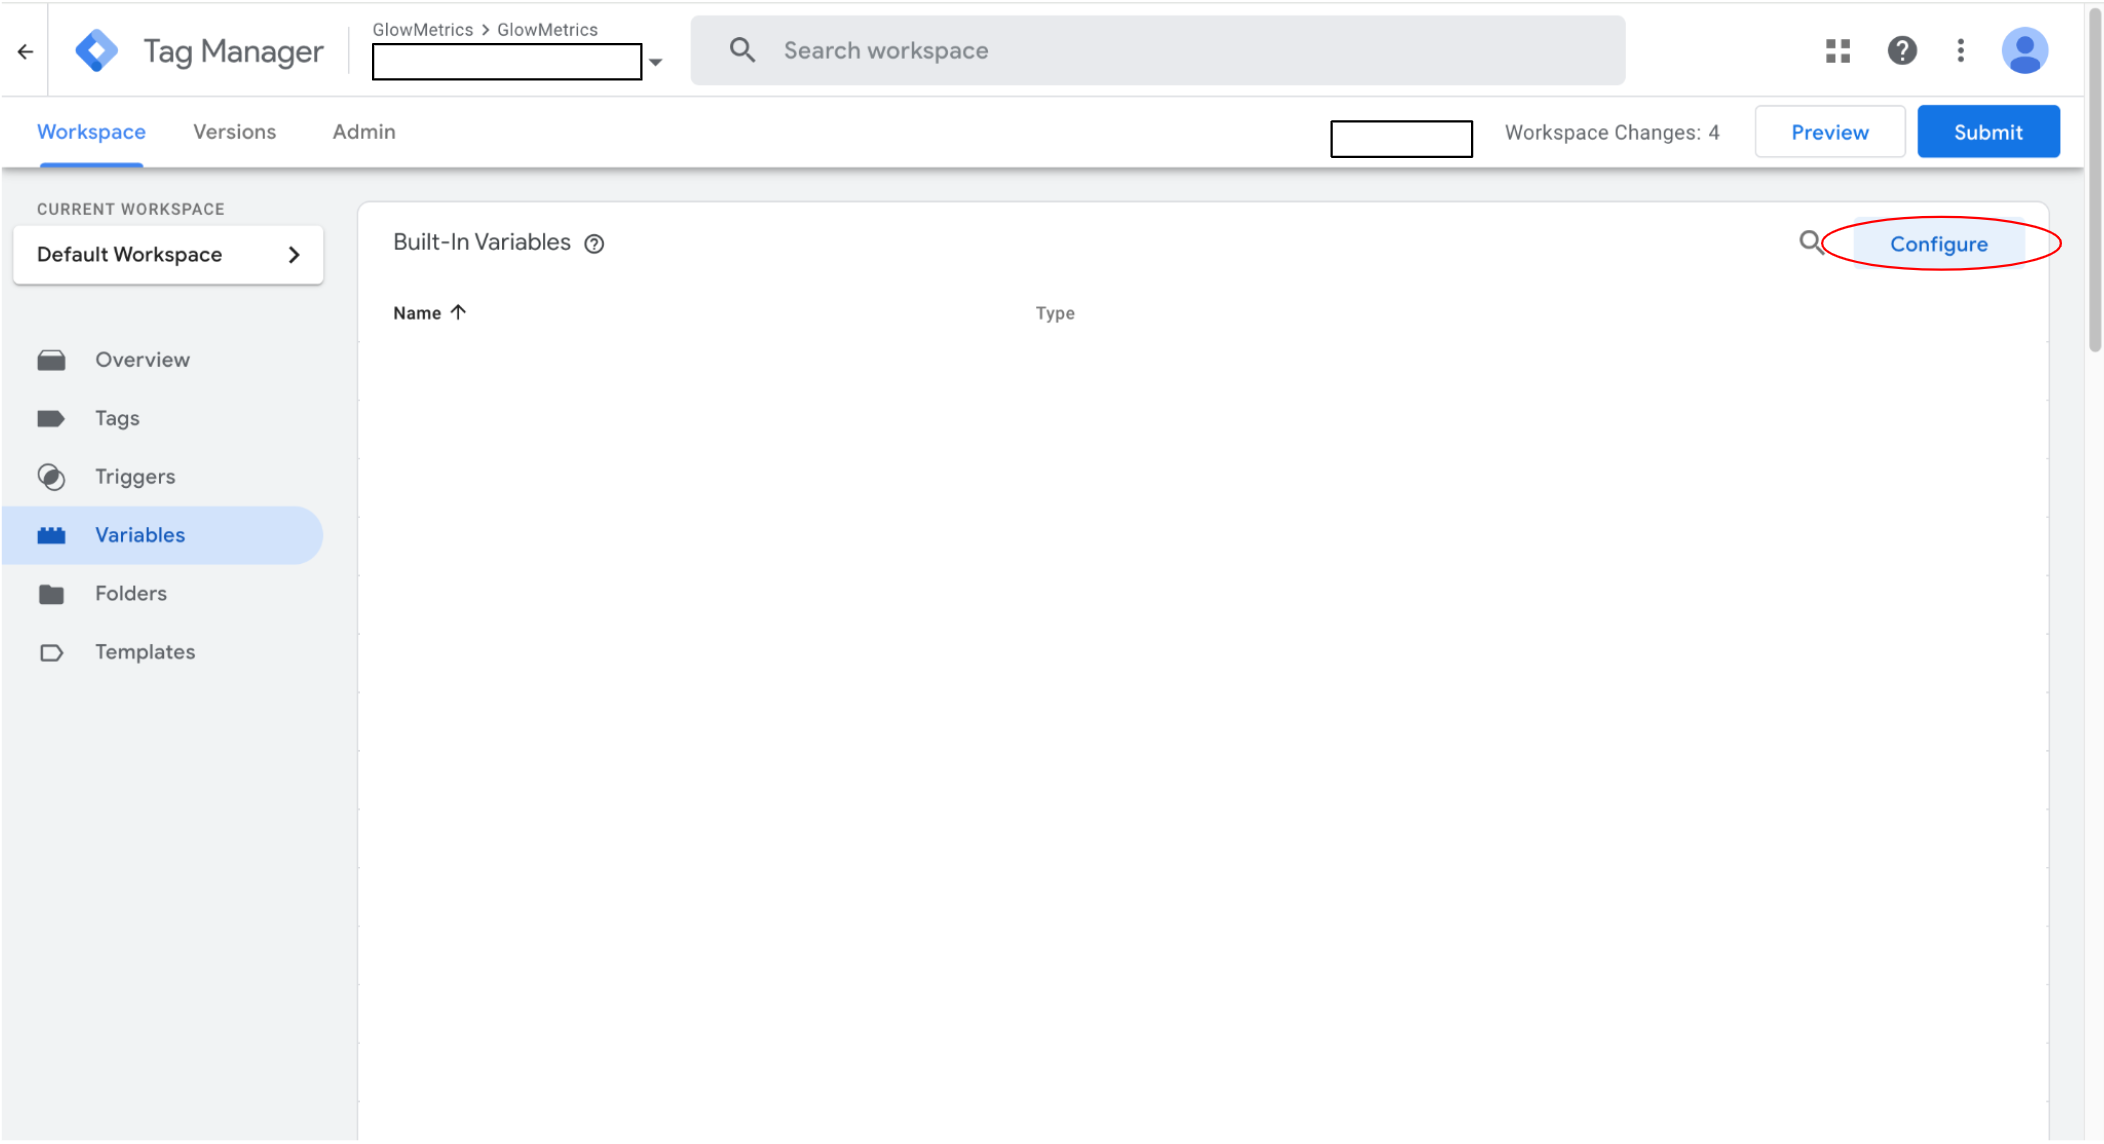
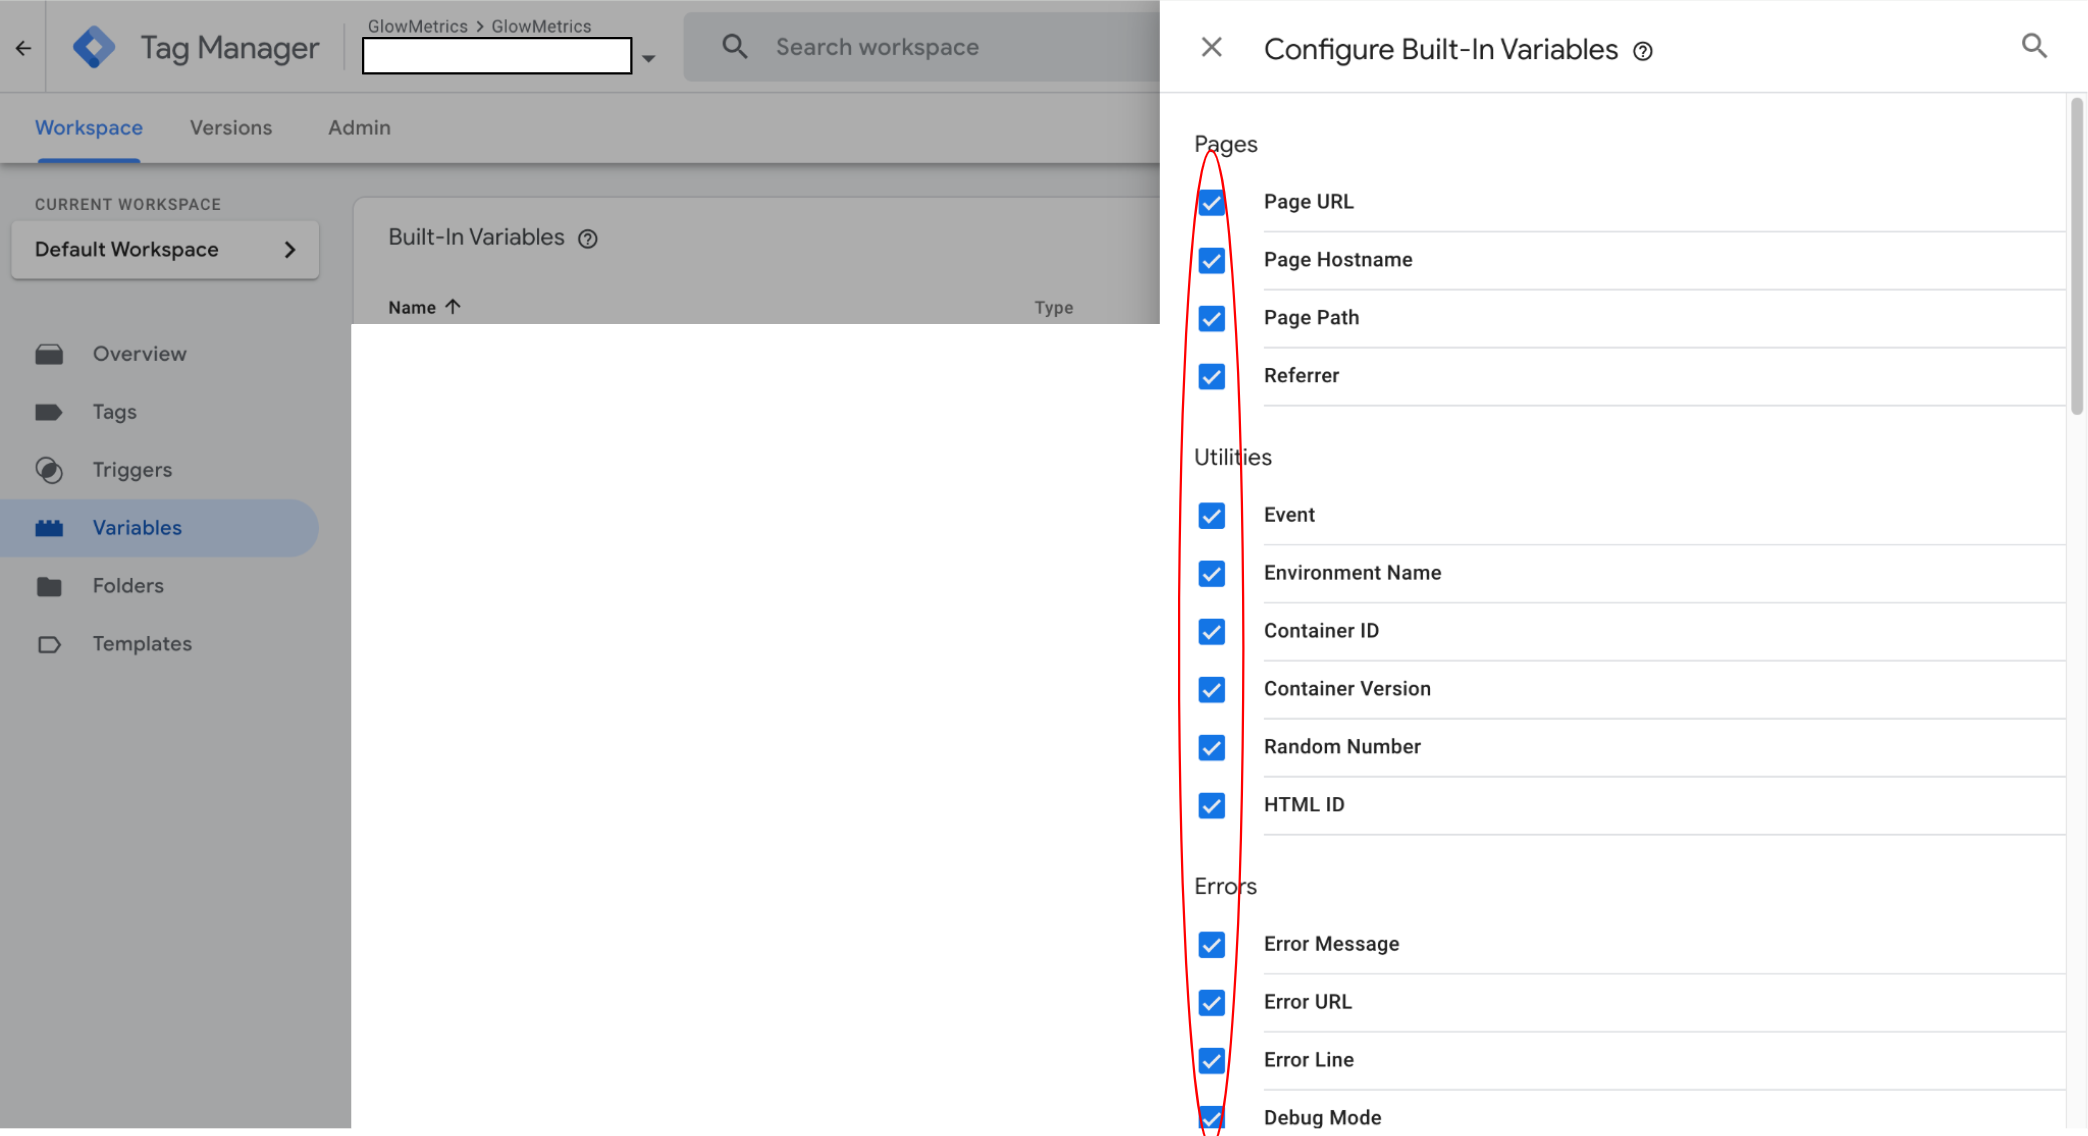
- Select your desired variables by ticking the boxes on the left. We tend to recommend enabling all built-in variables. While you may not utilise all variables immediately, having them pre-configured allows for easier implementation of new tags and tracking objectives as they arise.
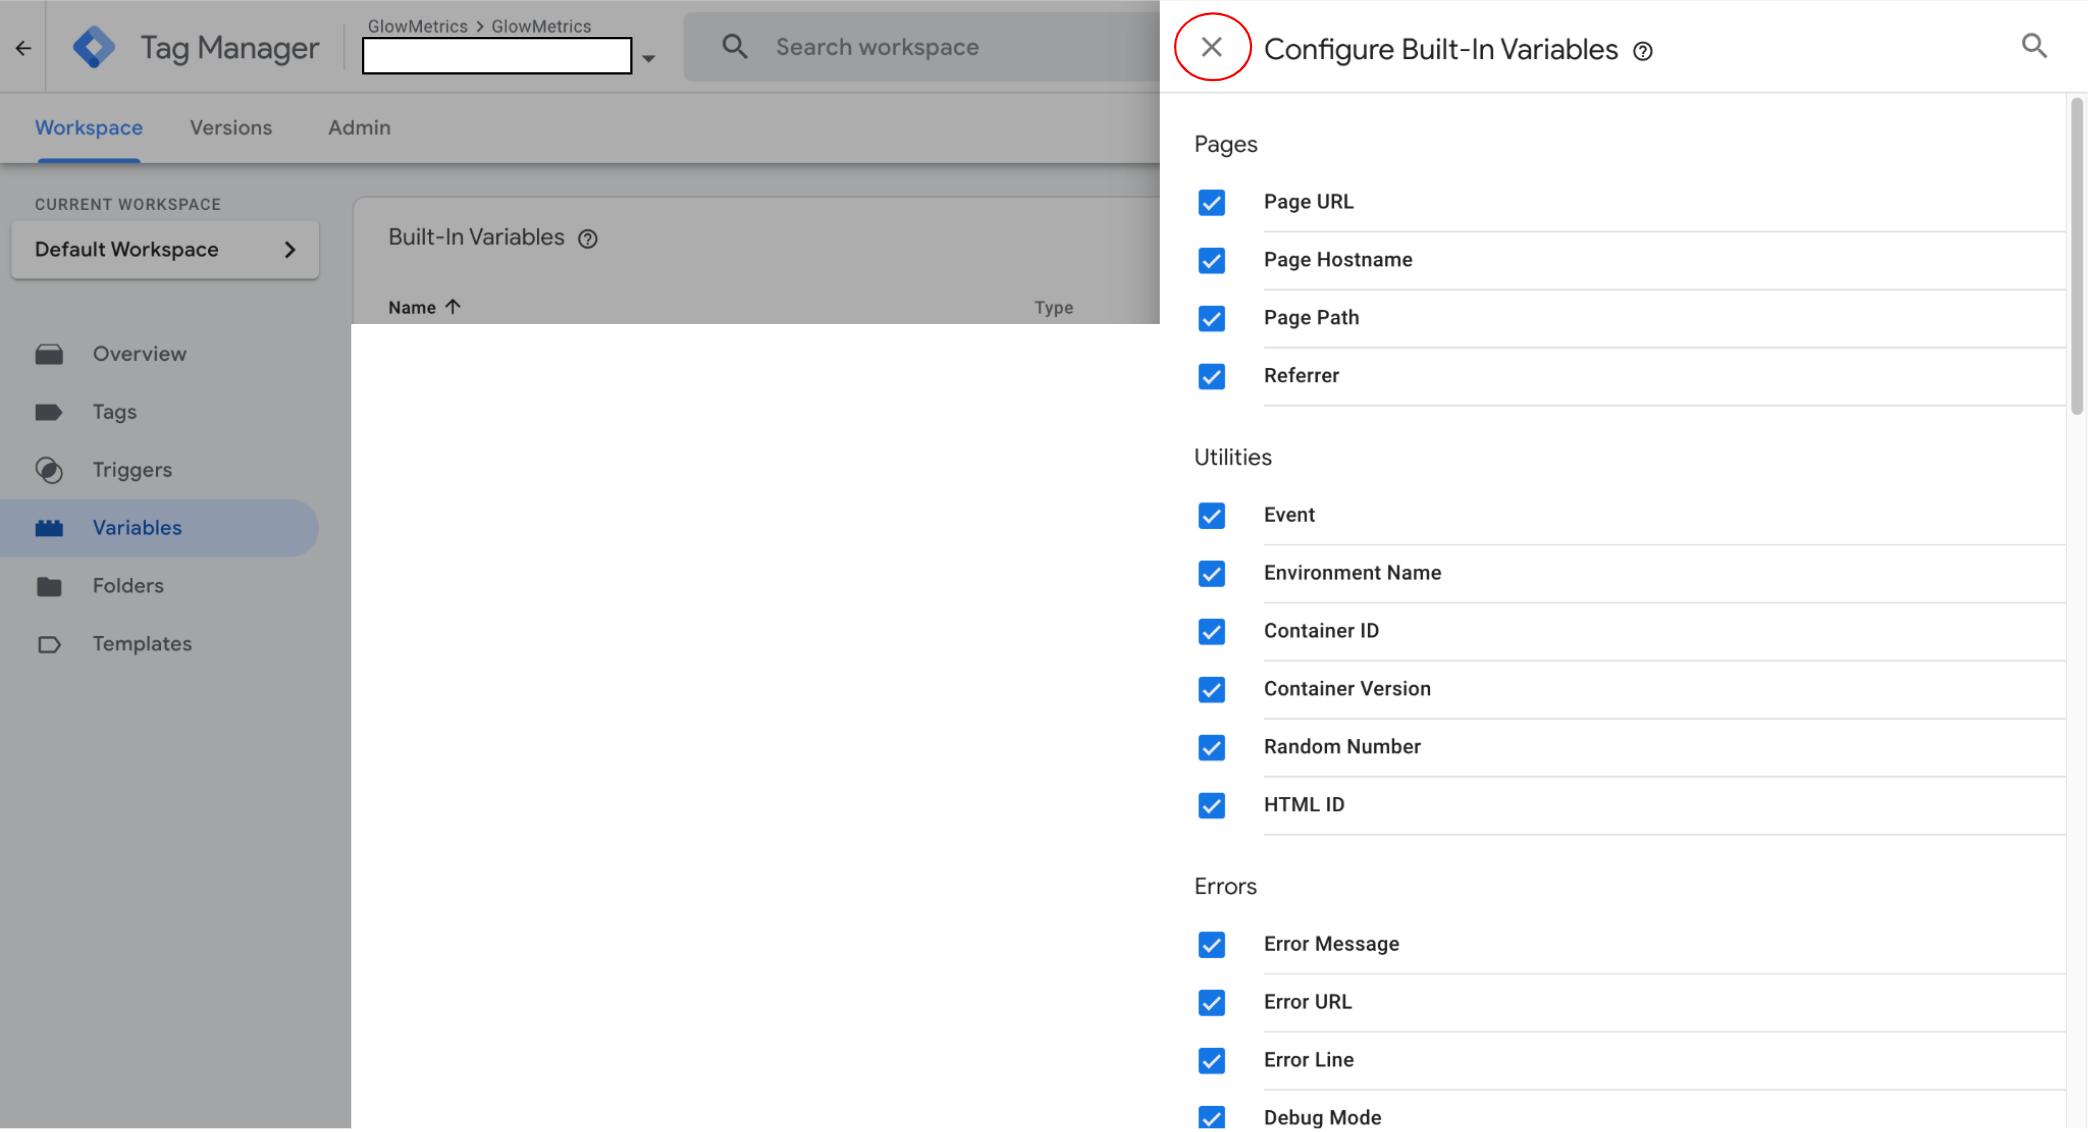
- Once you have selected all your desired variables, click “X” – these have now been configured and will appear in the “Built-In Variables” section as shown below.
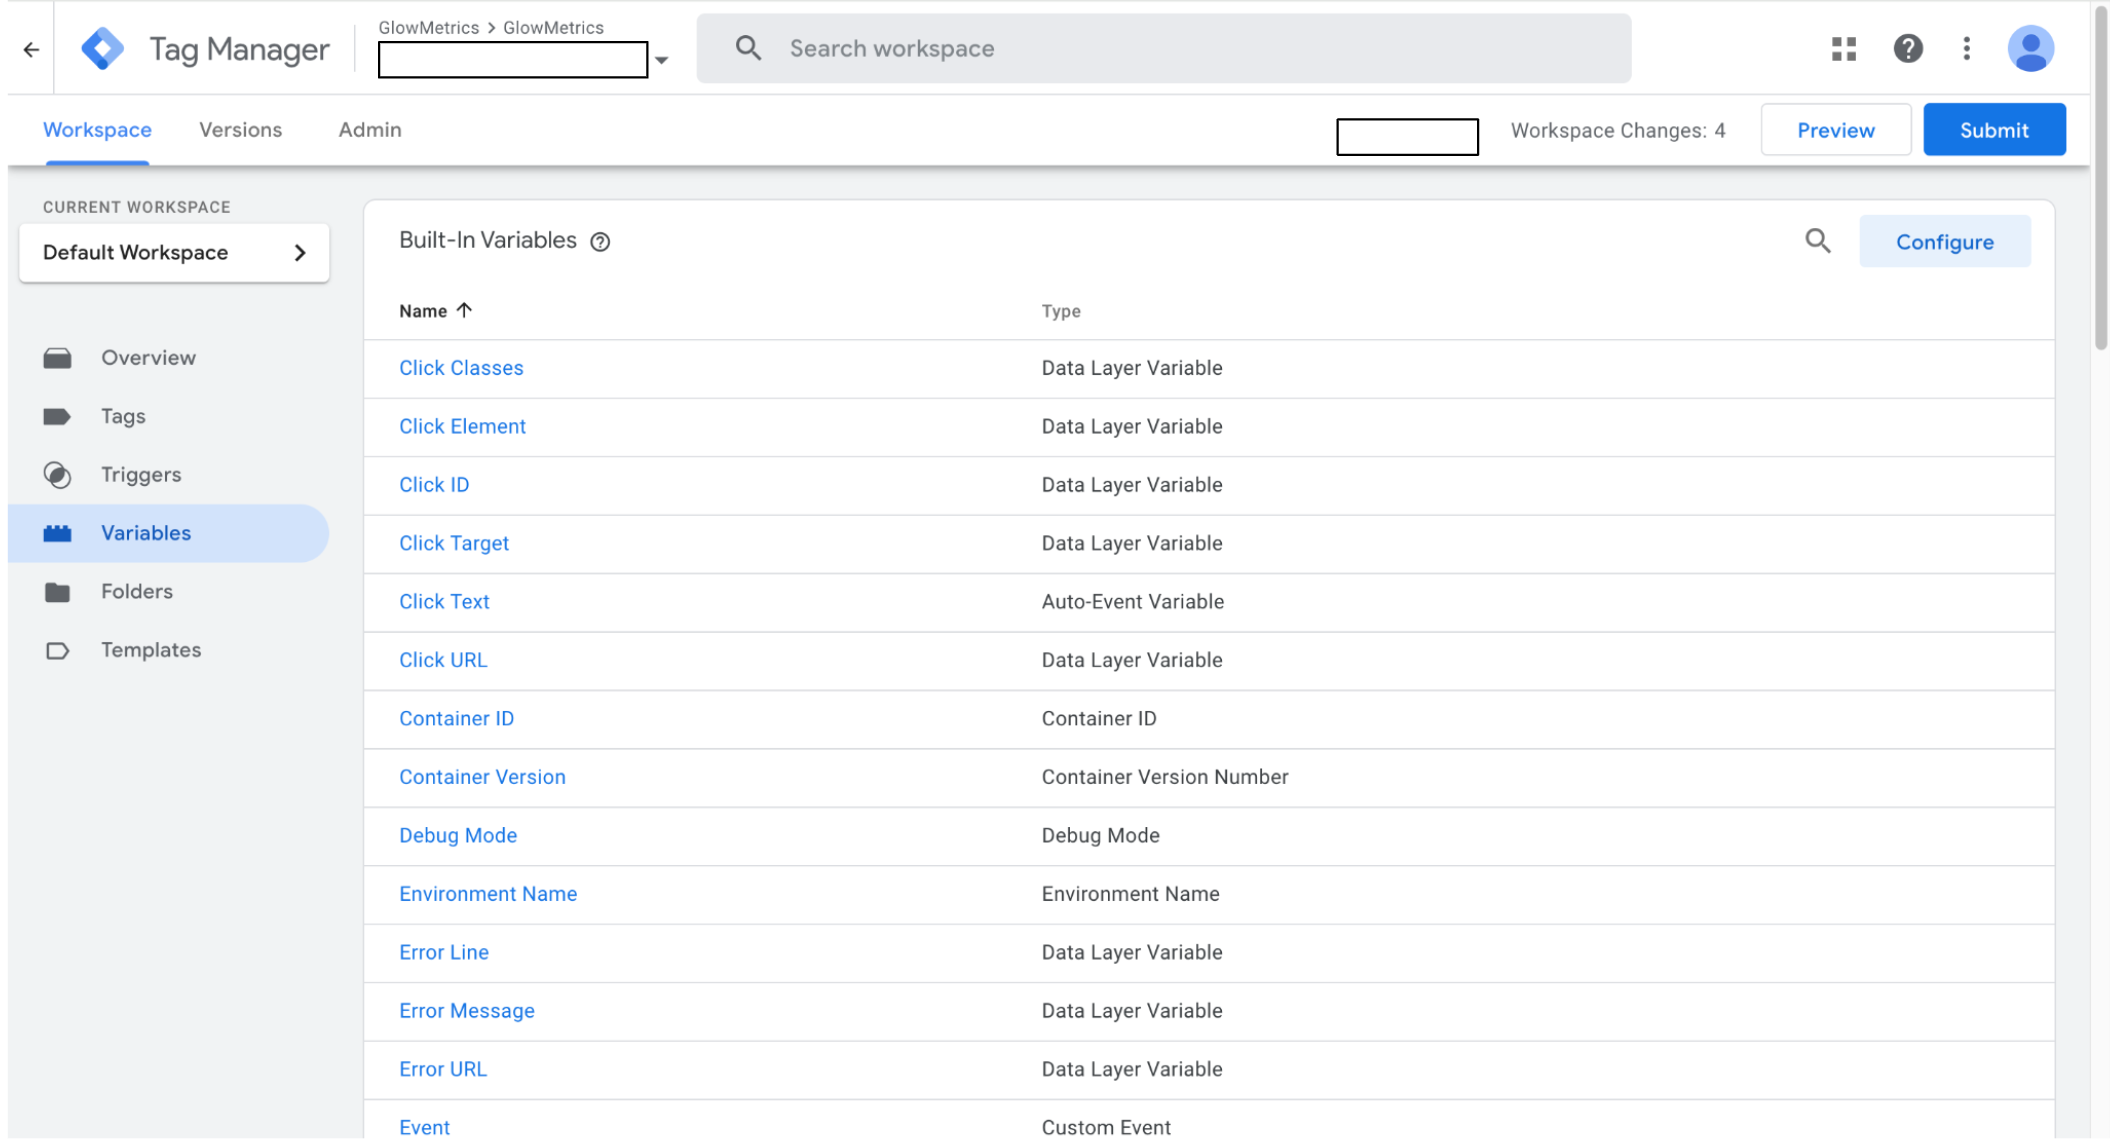
Utilising Built-in Variables in Tags (Example):
To track outbound link clicks, enable the “Click URL” and “Click Text” variables. Within your Google Analytics event tag, utilise these variables to capture the destination URL and anchor text of each outbound click, providing granular insights into user navigation behaviour.
Want to Learn More About Google Tag Manager?
For more on Google Tag Manager, check out our blog on FBCLID (Facebook’s Click Identifier) and how it impacts GA4 data or How to Add a Google Ads Conversion Linker tag. If you have any questions or there’s anything else we can help with on Google Tag Manager, please leave a comment below, or email [email protected].
You can also stay up-to-date by following GlowMetrics on Twitter or LinkedIn or by subscribing to our newsletter (link below) for the latest tips and news in the world of digital analytics and marketing.
Don’t forget to sign up for a FREE account on our Resource Hub to access a wealth of valuable resources, including exclusive Google Tag Manager how-to videos and insights!

Posted by
Georgia Sloan
Georgia is a Digital Analytics Assistant who has recently joined GlowMetrics. She works on assisting with projects across Google Analytics and Data Studio, creating data dashboards and social.
Read more from Georgia SloanBrowse by Category
- Social Media
- SEM
- SEO
- Google Ads
Digital Marketing
- Google Analytics
- Google Tag Manager
- Google Opimize
Digital Analytics

Optimise your website and marketing campaign performance with Ireland’s leading digital analytics agency
Sign up to our newsletterEnjoyed reading this article? Find more like it below…
Posted by
Georgia Sloan
May 7th 2024
Digital Analytics Insights
3 min read
Using Report-Level Elements in Looker Studio
Tired of copying and pasting repetitive content across your Looker Studio reports? When you have elements that need to be on every page, it can feel like a chore to...

Posted by
Georgia Sloan
Oct 21st 2024
Google Tag Manager
4 min read
Centralising Repetitive Parameters with Event Settings Variables in Google Tag Manager
What is a Parameter? In Google Analytics, parameters are additional pieces of information that provide context and details about user actions or "events" on a website or app. They are...

Posted by
Conor Ross
Apr 29th 2019
6 min read
Google Data Studio: An Overview of New Features
An Overview of New Features for 2019 Google’s data visualisation and reporting platform Data Studio has seen a huge number of tweaks and changes over the last year through a...
Leave a Reply